
Everyone loves a nice shiny composite part, but what many people do not know is how to get started. In this post, we’re going to show you how our twill carbon fiber and epoxy resin starter kit can help you get that information, give you that practice, and prepare you for work on your actual part. Do you want to get better at working with Carbon Fiber? Let’s get started!
Applying Release Agent to Mold
With mold in hand, we must “prepare” the surface. Preparing the surface allows us to quickly and easily remove the part from the mold once finished. In this kit we use a High Temp Mold Release. With a cloth, gently rub the mold surface in a circular motion, applying 4-5 layers of release agent.
Cutting Out Sections of Fiber
Once sufficient release agent has been applied, the next step is cutting the right amount of your Carbon Fiber Twill needed for the mold. Grab scissors and cut a snip of the fiber at one of its edges (any edge) and pull one of the resulting loose strands. This is done to give you a visual, allowing you to see the straight line you will cut. Cut out equal sections of fiber that you will use to add as reinforcement to the mold.
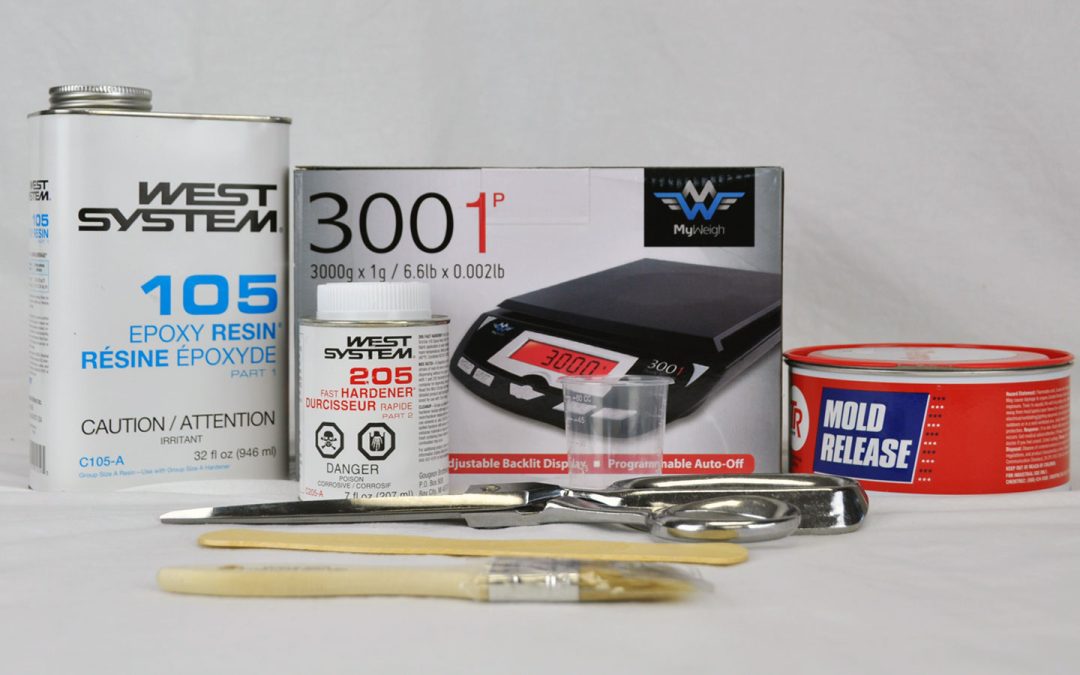
Mixing Resin
For a wet lay-up, the amount of resin that you will need is relatively equivalent to the weight of fabric that you are using; 50 grams of fabric leads you to 50ml of resin. With resin also comes the hardener; this is typically bought in Kits, where you have a choice of a slow hardener or fast. While you can pour, there is also a scale that allows for more precision. One thing with composites is that over time you develop a “feel” of what can and cannot work. Using this scale, as opposed to pouring a random amount, will help you develop a practical understanding of how much material is required. After a few parts that you create, you’ll notice that you can mix the required materials just off muscle memory. Whichever way you decide, these graduated mixing cups and mixing sticks will also help you out.
Now I wanted to talk to you a bit about the mixing sticks and their application. First, your part will not cure if you do not mix your resin properly. The follow up question is, “What does it mean to mix properly?” I would suggest mixing the resin for about 3 minutes, ensuring that you scrape off the sides of the cup while you are mixing. Once finished mixing, pour your resin into another empty graduated mixing cup, not forgetting to scrape off the sides of the first cup, into the second cup.
Placing Fiber on Mold
With brush in hand, apply a coat of resin-hardener mixture to the mold. You’re now going to apply the first layer of fabric to the mold. Be very careful to clear the fabric surface of any debris as this first layer will be the one that everybody sees! Insert the fabric on to the mold and using that same brush mentioned previously, apply your epoxy mixture to the fiber; be sure to properly wet the fabric. Continue this process until all your layers of fabric are placed on the mold.
Cure
After getting this far, let’s make sure that we don’t lose all our hard work. The curing stage is a very delicate process that requires a certain temperature, which in our case is 21℃ – 25℃. Be sure to read the manufacturers label as to the length of time required. Important however, stay in the temperature range provided above. If you’re reading this in the wintertime, it still applies to you too!
Enjoy your part, show it off, and go back to the start of the article for your second try; remember, this is all about practice!